 Vblink777
Backend guide
Vblink Backend Tutorial: Players & Credits
Published October 15, 2026 · Updated October 15, 2026
This Vblink backend tutorial is for agents and store owners who already have permission to manage accounts.
The steps come from Titan Gaming Solutions’ VBlink backend demonstration, published April 13, 2026. The video shows one VBlink777.Club panel; menu names and available controls may differ in the panel supplied to your business. We reviewed the video and its transcript on October 15, 2026, without signing in to a live backend. The cover image is the video’s original thumbnail, credited to Titan Gaming Solutions.
Get access to your Vblink backend
Open the backend address supplied by the organization that issued your agent or store account, and sign in with the credentials for that account. If you have lost the address or cannot sign in, contact that organization through your existing support channel. This site does not issue backend accounts or reset their passwords.
The demonstration begins inside User Management after login. It does not establish a universal Vblink backend login URL. Players who need the game sign-in can follow the Vblink777 login guide; the instructions below concern account administration.
Jump to a task
The video runs for 1 minute 34 seconds. Each video link opens the relevant part of the demonstration.
Access and permission questions and the FAQ follow the steps.
1. Create an agent account
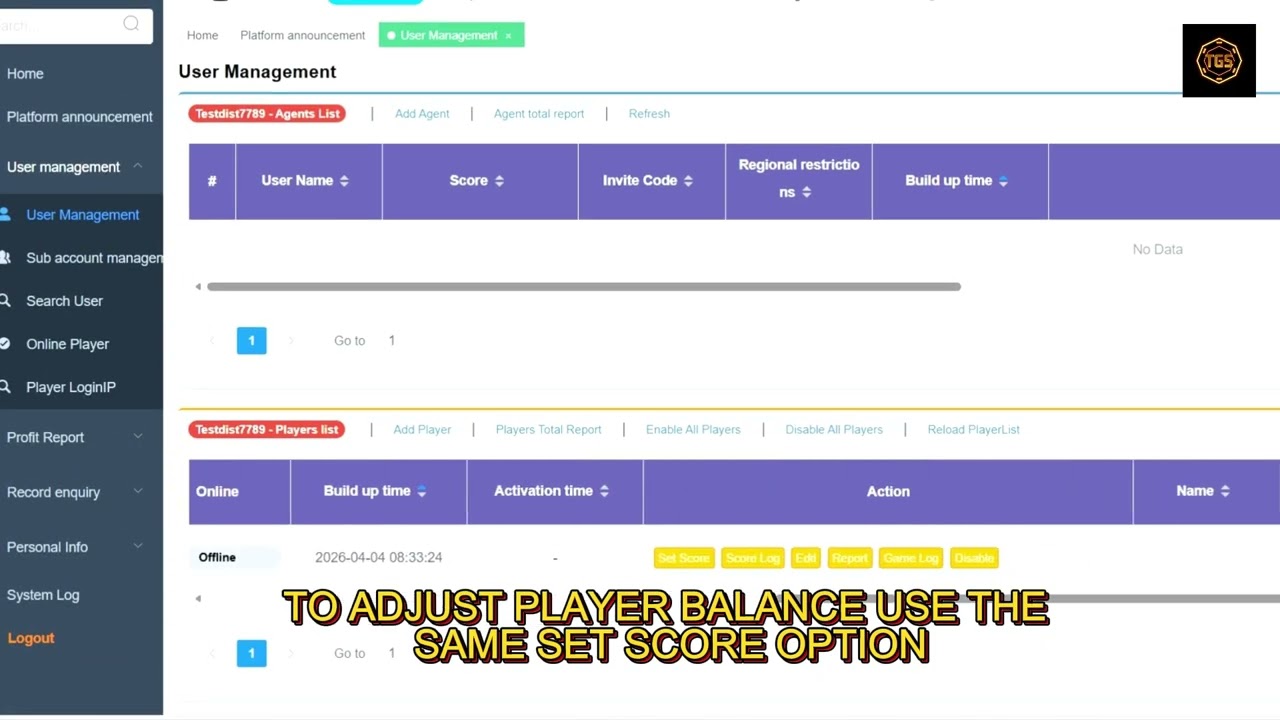
In the agent account segment at 0:10, the presenter opens User Management in the left sidebar, then chooses User Management again from its submenu. This screen has separate agent and player lists.
- Open the User Management screen and find the agent list.
- Select Add Agent.
- Enter the new account’s username and password.
- Review the remaining form fields. The demonstration leaves Invite Code blank; follow your provider’s requirements if your form requires a value.
- The video shows a prompt to generate a QR code. Confirm that prompt, then confirm the form with OK.
Return to the agent list and check for the username you entered. The presenter calls this a distributor account, while the button is labeled Add Agent. Use your provider’s account-role definitions when deciding which permissions to assign.
2. Create a player account
The player account segment starts at 0:40. It uses the player list farther down the same User Management screen.
- Return to User Management and scroll to the player list.
- Choose Add Player.
- Enter the required account details in the form shown by your panel.
- Review the fields before selecting OK. The video leaves the invite field blank in this example.
- Find the new username in the player list and check that it matches the intended account.
Keep the agent list and player list separate when checking the result. Add Agent creates the account type used in the first task; Add Player is the control demonstrated for a player account.
3. Add or remove player points with Set Score
The Set Score explanation at 0:54 covers points adjustments. In this demonstration, a positive value adds points and a negative value removes them.
- Find the intended player in User Management.
- Open Set Score in that player’s action controls.
- Check the Player account and Current Point shown on the form.
- Enter the adjustment in Set Score, checking both the amount and its sign.
- Confirm with OK, then check the player’s balance and the corresponding Score Log entry.
Before repeating an adjustment after a slow response or an error, check the records to see whether it already went through. Repeating the entry without checking could apply the change twice.
This action changes points in the panel. The video does not show money being sent to a player, so removing points should not be recorded as proof of a completed cash payment.
4. Check player records in Score Log
Follow the Score Log segment at 1:03 to look up the adjustment you made.
- Open Record enquiry in the sidebar, then Score Log.
- Select Player account and specify the player you want to review.
- Set Start Time and End Time to include the adjustment.
- Click OK to load the records.
- Compare the listed Player account, Topup point, and Points before with the adjustment you intended.
If the record is missing, check the selected account and widen the date range before assuming the adjustment failed. Include the date range and the relevant record when asking your provider to investigate a mismatch.
5. Change an account password
The password segment at 1:14 uses Edit on the relevant account.
- Locate the account and check its username.
- Select Edit in its action controls.
- Enter the new password in the password field.
- Review the selected account and confirm with OK.
If the panel reports an error, record the message and contact the organization that manages your access. Keep passwords out of support screenshots. For a player who cannot sign in after an account change, use the player login troubleshooting guide to check the login route and credentials.
6. Disable an account
At 1:24, the video shows Disable in the account’s action controls.
Find the intended account, verify the username, and choose Disable. Follow any confirmation presented by your panel, then check the account’s displayed status or the result message. If the outcome is unclear, ask your provider to confirm the account state before making another change.
The demonstration does not walk through re-enabling an account. Confirm that process with your provider if you need to restore access later.
If your panel or results differ
If Add Agent, Add Player, or Set Score is missing, ask your provider to confirm your role and the controls available to that role. Send the menu name and the action you were trying to perform, along with the panel version if it is displayed.
For a balance discrepancy, collect the player identifier, the adjustment you intended, and the relevant Score Log record. Check the account and time filter before retrying. Your provider needs those details to trace the change; this notes site cannot inspect or alter the backend record.
Source and review
- Video: VBlink Backend Tutorial | VBlink777.Club Agent & Distributor Setup (Full Guide), Titan Gaming Solutions, published April 13, 2026.
- Reviewed October 15, 2026 against the video, its visible interface, and its transcript. This article is an independent written walkthrough, not a report of our own live backend testing.
- Coverage is limited to the account, points, and record tasks demonstrated above. The video description also mentions payouts, POS systems, and kiosks, but the walkthrough does not demonstrate those workflows.
FAQ
How do I access the Vblink backend?
Use the backend address and credentials supplied by the organization that issued your agent or store account. This tutorial follows a VBlink777.Club demonstration and does not establish a universal backend URL.
Why can't I see Add Agent or Set Score?
The video shows these controls in its demonstration account. If your panel differs, ask the organization that issued your access to confirm your account role, permissions, and panel version.
How do I add or remove player points?
In the demonstrated panel, open the player's Set Score action. The tutorial uses a positive value to add points and a negative value to remove them. Check the selected account and amount before confirming, then review the balance and Score Log.
Does removing points complete a cash payout?
The video demonstrates a points adjustment. It does not demonstrate sending money or completing a cash payment. A negative Set Score entry alone does not establish that a player has been paid.
Where can I check a player's score history?
The demonstrated route is Record enquiry, then Score Log. Select Player account, choose the start and end times, and click OK. Check that the account and date range match the adjustment you are reviewing.
How do I change a password or disable an account?
The video uses Edit on the relevant account to enter and confirm a new password. It shows Disable in the account's action controls for disabling. Verify which account you selected before confirming either change.